I will be posting this yearly. I like to direct download my podcast to my computer, this list just makes it easier to find them. When possible I post the direct feed to a podcast. You can download them also on any podcast catcher you may have, like iTUNES or Stitcher. I am sure you have an app of some sort to do this. THE LINKS AR.E HIGHLIGHTED IN BLUE to make them easier to find.
I will update as I find new links to post, need to get the blogs linked up to the pod-caster. IF YOU find some new podcast please add a link to the comments on this post. I wish I was a better programmer so I could make this blog post prettier but I am self taught and half the time I never know what I am doing when it comes to programming.
For those new to podcasting you can download the file by:
- RIGHT CLICK on the podcast ICON on the blog.
- USE the various windows for that browser …
- SAVE THE LINK, SAVE THE TARGET
- Save the file to the folder you will find the file in… I use MY MUSIC / QUILT PODCAST
- TO listen to the podcast use your favorite media player … Mine is WINDOWS MEDIA PLAYER …
The podcasts are in no particular order ….. except the first one… that one is mine.
~~~~~~~~~~~~~~~~~~~~~~~~~~~~~~~~~~~~~~~~~~~~~~~~
Nonnie’s Quilting Dreams…. THIS one is mine!
This podcast is mine it is totally irregular uploading of episodes since I work as a full time nurse and when I come home from work I am totally tired. To be honest I have not gotten very far in my FINISHES this year. I love quilting and try to keep working on my projects… but it is slow going. I do blog and podcast about the the quilt books, notions and newest techniques I buy.
I have been very bad at podcasting this past year…. I hope to do better… that said I am not removing my link.
….
~~~~~~~~~~~~~~~~~~~~~~~~~~~~~

Off-Kilter Quilt
http://offkilterquilt.com/
OFF KILTER QUILT new blog page
…. … OFF KILTER QUILT has a new web page … adding it here till I get around to the next update of this web page
Frances is a children’s book author who has taken up quilting in the past 8 years. She is a dedicated finisher and takes you along on her journey. I loved listening to her podcast over the last 5 years as she progressed from a newbie with a new to her sewing machine to an accomplished quilter. This past year Frances has started writing QUILT related books and quilts to relate to her books. She entered two quilts in QUILT CON. Recently she has been designing her own quilts both for her books and because THAT IS THE WAY SHE ROLLS.
>>>>
>>>>
Frances is from North Carolina and talks about her life, her kids, quilting and the weather. ( joke) She also often talks about the books she is reviewing. Frances often wanders off topic but so delightfully. I look forward to everyone of her episodes and often listen to them more than once.
FRANCES has a new podcast for Creative Writing for kids…..
Started in APRIL 2014 … loved them wish their were more
.
BTW …. I will post links to Amazon and other sale sites but as of now I do not have any affiliation to these sited and do not get any compensation for doing so…… Just trying to make things easier for my readers.
**************************************************
Hip to be a Square
direct podcast link page
Pam is the most prolific and consistent pod-caster and quilter. Her out put is amazing especially when you consider she works at home at a very busy job and family life. She talks alot about her process. I follow both her blog and podcast in Feedly so I do not miss an episode. Pam with her friend Lynn also started a video podcast QUILT SHOW on YOU TUBE. Pam posts the video and the audio for this show…. if you have not seen it you will want to check it out.
Pam and Daisy are currently reading books together and then reviewing them as part of the podcast. Their book picks are interesting. I know you will find this an interesting quilting podcast to listen to… she will definitely inspire you to keep at your projects.
PAM now host THE STITCH TV SHOW on
YOU TUBE
THE STITCH TV SHOW
THE STITCH ON YOU TUBE LINK
**********************************************
*************************************************
VICKIE’S CREATIVE CORNER 3
DIRECT RSS FEED
https://mycreativecorner3.podbean.com/feed/
.
VICKIE’S BLOG ….. MY CREATIVE CORNER 3
.
MY CREATIVE CORNER 3 — PODBEAN LINK to find the newest episode
I met VICKIE at last year’s 2016 AQS GRAND RAPIDS QUILT SHOW. This past year she launched her podcast and has been very consistent in getting a podcast posted. She is a long armer and avid quilter, she also participates in other crafts. In the summer her husband and her go on the road and participate in multiple HIGHLAND GAMES. Her blog and podcast has been fun to follow. I think I have a particular fondness for her podcast because she is a fellow MICHIGANDER and I can really relate to her posts.
http://mycreativecorner3.podbean.com/feed/
**********************************************
*************************************************
This is LAZY DAISY’S ROUND ROBIN QUILT 
LAZY DAISY QUILTS ( and READS) …..
Because I AM and I Do ….
http://ldq.outlandishthreads.com
LOVE, LOVE, LOVE Daisy’s podcast … she is so real. She says it like she sees it. Daisy use to be a costumer but now works in a quilt shop where she does the long arming. She discusses all aspects of quilting, current happenings in her life and what she is currently reading and watching on tv. She is currently designing embroidery for the TV show OUTLANDER the patterns are available for free on Craftsy AND thru FANDOM IN STITCHES.
LINK TO FANDOM IN STITCHES
**********************************************************
.
http://katiesquiltingcorner.com/ Katie’s Quilting Corners
http://feeds.feedburner.com/KatiesQuiltingCornerPodcast
http://katiesquiltingcorner.com/
Katie is a 30s something quilter / crafter, as she calls herself. She talks about her quilts, her life and the recent changes, and her beloved dogs. She took a hiatus from podcasting but has since returned and is putting out new episodes in audio and occasional video . She recently designed an awesome pattern that is free for download in craftsy…. absolutely love the pattern and hope to do it this summer.
I am catching up with her new episodes and have her on my FEEDLY blog catcher. COME and join the conversation. .
*************************************
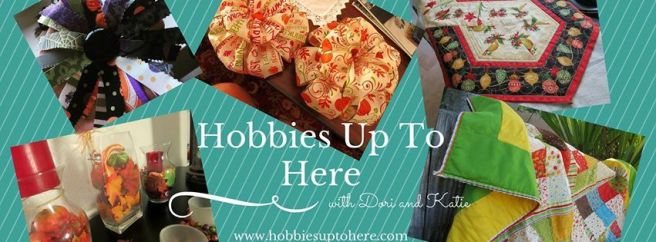
HOBBIES UP TO HERE PODCAST AND BLOG
This podcast was started earlier in 2015 but I just discovered it in February, 2016. The conversation is between Dori the mom and Kati the daughter. They discuss various hobbies but quilting is their main focus. They also talk about what is going on in their life at the time of the podcast.
Currently there are 31 episodes and they are an absolute hoot…. I have been listening going back to the beginning …. I have added them to my FEEDLY BLOG READER so I do not miss a post / episode.
THIS IS A MUST LISTEN TO PODCAST… I think you will enjoy it.
Direct RSS feed to HOBBIES UP TO HERE…… YOU can also download them from iTUNES
http://www.podbean.com/podcast-detail/atgyk-3cd3d/Hobbies-Up-To-Here
RSS FEED for HOBBIES UP TO HERE
BLOG LINK > LINK to HOBBIES UP TO HERE BLOG
https://www.facebook.com/hobbiesuptohere/ >>>>
HOBBIES UP TO HERE FACEBOOK PAGE
*********************************************

CRAFTY PLANNER :
Sandi Hazlewood.is the creator of Crafty Planner. She has great interviews of quilters and crafters … she is equal opportunity. When I listen to Sandi’s podcast I know I am in for a treat.
****************************************
WHILE SHE NAPS on iTunes
on iTunes … ABBY GLASSENBURG … WHILE SHE NAPS….. JULY 2014
.. DIRECT DOWNLINK TO … WHILE SHE NAPS ….
Abby post about quilting usually from the business side of quilting. She host great interviews with the stars of quilting. Her posts this year has been most enjoyable.
****************************************

https://www.buzzsprout.com/70645.rss
DIRECT RSS FEED DOWNLOAD LINK
https://leahday.com/
LEAH DAY started a new podcast. She does talks about what she is doing in her various endeavors and she does interviews of quilters…. some famous and some just regular home grown quilters. She stared out posting weekly but now has cut back to every other week…. of if LIFE GOT IN THE WAY once a month. I think you will enjoy listening to her posts.
I down load her on iTunes ( and you know I do not like iTUNES) but that way I have not missed an episode.
*********************************************
I first saw Pat when she presented her trunk show soon after I was introduced to quilting back in 2005. To think of it I think she was the first national teacher I had been exposed to. Pat was also the first podcast I use to listen to when I learned about podcasting in 2010. ( Remember I am not of the computer generation that learns how to use a computer in grade school. Computers had not even been invented when I went to school.) Pat currently works with American Patchwork and Quilting magazine but she had been podcasting for several years before she affiliated with them. Pat has been in the quilting business for years and has interviewed many of the nationally known quilting divas. She always have interesting guest to listen to. Pat publishes weekly so you can count on her when you want to listen to podcast while working on a project she always has something quilty to listen to.
Toginet …. Pat Sloan: American PATCHWORK and Quilting
PAT SLOAN’S Creative Talk Radio BLOG
******************************************

SLIGHTLY MAD QUILT LADY from NEW ZEALAND …..
I LOVE, LOVE, LOVE Charlotte’s accent ( She has told me I am the one with the accent…. Ha! Ha! ) She talks about her new studio quilting space and her life on a boat. She also does interviews of other NEW ZEALAND quilters. She is a sought after Art Quilter and is in demand for classes…. I think this lady is going somewhere …. hope to see her on THE QUILT SHOW some day.
***************************************

MODERN SEW-CIETY ….
***********************************
WEEZY WORKS HOME PAGE . . .
NEW VIDEO PODCAST FROM WEEZY WORKS a fellow TWILTER . . . .
Weezy is a twillter friend who I follow TWITTER. Weezy post video podcast but I can only view them when I am awake between MN to 0500 (eastern standard time.) I do download all of the audio episodes to my computer and listen to them when I listen during a sewing session. Weezy investigates all types of quilting and is a fun listen.
**************************************************
Quilt Cabana Corner Podcast
SANDI podcasts about her life as a mother of two girls , her quilts. She is a designer of applique patterns and has been published in quilting magazines. She is the author of Little Quilts for Big Occasions . Give her a listen.
.**************************************************

JENNIFER IS BACK ON THE AIRWAVES … and she has a treasury of older podcast to check into… she interviews crafters and quilters.
links to CRAFT SANITY
LINKS to CRAFT SANITY PODCAST
Find her on iTUNES for easier download.
**************************************************
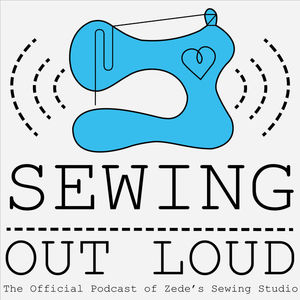
SEWING OUT LOUD …
A mother & daughter team talk about the adventures of sewing as a business and a loving hobby. I like their practical advice … and I love the stories on how to deal with customers and problems. I down load them via iTunes as I had trouble finding them on an RSS FEED… but you can try the link below..
https://www.podcastchart.com/podcasts/sewing-out-loud
SEWING OUT LOUD PODCAST EPISODES
******************************************************
String and Story FACE BOOK QUILT VIDEOS
Holly Anne is a fellow TWILTER and started making quilt videos earlier this year. I only get to watch them if I am awake at midnight…. when I am awake I make a point to check out her most recent posts. She describes herself as a MODERN IMPRESSION QUILTER but also does T shirts for customers.
https://www.stringandstory.com/
STRING AND STORY BLOG POST
https://www.facebook.com/pg/stringandstory/videos/
************************************************************
***********************************************************
***************************************************

HISTORY CHICKS is one of my favorite non quilting podcast. I plan to make a thread for my favorite non quilting podcast but until then…. I am parking them here. Check them out … even if you are not into history you will enjoy these ladies.
HISTORY CHICKS PODCAST EPISODES
http://thehistorychicks.com/category/podcasts/
**************************************************
DEFUNCT PODCASTS:
These pages might have been taken down as it is rather expensive to keep it up but I am hoping they will come back.
**********************************************
HOW TO DOWNLOAD A PODCAST FROM A DIRECT FEED
http://nonniesquiltingdreams.podbean.com/
On the bottom of the post it says :
Like | Share | Comments | Embed | Download | Plays (100)
If you left click on Download it takes you to a download page… then right click on the icon that pops up
A window with various commands opens …. choose … SAVE AS, SAVE AS TARGET or Save File
( your browser will dictate the wordage)
….
Save the file to your computer ( I use MY MUSIC) …
YOU can then listen with your MEDIA PLAYER
YOU can also download from i Tunes if you subscribe
.
YOU CAN DOWNLOAD DIRECT any podcast file on a blog.
**************************************************
**************************************************
Save
Save
Save
Save
Save
Save
.
.
HAPPY QUILTING,
NONNIE

https://nonniequiltingdreams.wordpress.com/ Nonnie’s Blog
http://nonniesquiltingdreams.podbean.com/ Nonnie’s Quilting Dream Podcast
Links for Nonnie’s Quilting Dreams
FOLLOW ME ON TWITTER @NONNIE_P ….. @NONNIE_P
email me at: nonniequiltingdreams@gmail.com
Save
Save
Save
Save
Save
Save
Save
Save
Save
Save
Save
Save
Save
Save