I AM NOT STARTING ANOTHER UFO!!!

Inspiration: 2006 DESQG Raffle Quilt


THIS was the quilt I fell in love with and dreamed about for ages.

Australian Patchwork — Found the original pattern ( scan)

This is the original pattern found recently in Australian Patchwork, first installment, just this year.

Gathering of ideas, supplies, fabric – drafting my own patterns


I am gathering my supplies, fabrics, redrafting my patterns, testing techniques. The butterscotch fabric is bolder than the original buff color background. The butterscotch is similar to what is on the bedroom walls. Maybe I will get this quilt done before I get the bedroom repainted.


*
*
*

I have been dreaming of this quilt since I first saw it in my guild’s 2006 raffle.  I think it was what inspired me to start attending meetings on a regular basis.  Up till then I only went once in a while.   No one could tell me what the pattern was named or where it originated.  So I started collecting leaf patterns and motifs in order to make my own version.  I started buying fabric just for this quilt.  The vision changed over the years but not that much.  I bought 9 yards of background fabric when the LQS had a great sale.  To this day that was the most yardage of one fabric I have ever purchased.  I bought smaller quantity of fabric just for this quilt.  I have been raiding my stash looking for fabrics to put into this DREAM quilt. 


Recently when cleaning and trying to reorganize my messed up quilt magazines library,  I found an AUSTRALIAN PATCHWORK magazine that I had bought earlier this year at the rummage table at a quilt show.  I got magazines for 25 cents and I bought $5, worth.  As my habit I started tearing out pictures and information from the magazine older than 2005 for inspiration.  I found the original pattern for the quilt. ( First installment of three.)  I did not know I had it.  I was thrilled. 


I have been redrafting the block patterns because I want my quilt to have a slightly different look.  Plus my adage is, “I can always trim the blocks to a smaller size but IT IS TOO HARD TO MAKE A SMALL BLOCK BIGGER.”   I am going to add other leaves on the quilt… appliqued oak, beech, aspen leaves, as these are the trees that grow in our 8 acre yard.  I am also planning on doing some different borders and center panel treatment, since I do not believe in copying patterns, but I believe you can use them for inspiration.  I have to find a way to make this 70 inch quilt fit a King size bed  ….. I need closer to 110 – 120 inches square to look good on our bed.


As per Francis Dowell on the OFF KILT QUILTER POD CAST, I hope to keep a quilting diary of the progress of this quilt.  I am hoping this keeps me motivated.   I plan to post weekly on where I am at with this project.  I also have several other large projects in the works that I really should finish.

  • Renaissance Angels BOM … I have 18 completed blocks… Still have no idea of what I am going to do with those blocks.  (See earlier posts for details on these quilts. )
  • THIS FABRIC SPEAKS TO ME blocks are still being constructed
  • My daughter wants a Tims’ Kool Kaleidoscope style quilt.

*
*
*
Just so you all know… I edit my pictures so the background is unobtrusive.  I am fighting with WORDPRESS because I can not get the formatting on this page done the way I would like it.  So I am working around it.  I wonder how everyone else gets such nice blogs????   The astrists * * * help keep the journaling where I want it on my page.

*
*
*
HAPPY QUILTING

NONNIE

15 minute Table Runner…. That took me an hour to make.

The reason it took me an hour to sew this table runner was I had an active almost three year old trying to help me “sew.” He would do things like push the buttons every time I got up to press, changing the machine setting. I ended up breaking a needle. He unplugged my iron. Once I banished him from the sewing room upstairs with grandpa the entire project went much faster and more accurate. I took pictures as I went along but I forgot to take a picture of the final product. The table runner is currently on its way as a gift for a dinner party.I raided my stash selecting two coordinate but constrasting fabrics. There are two versions of this table runner, based on the width of the fabric used.
 

WIDTH OF FABRIC:

FABRIC –A : FOCAL 9 INCHES ( OR 12 inches for the wider version.)

FABRIC –B: ACCENT AND BACKING —18 INCHES ( or 24 inches for the wider version)

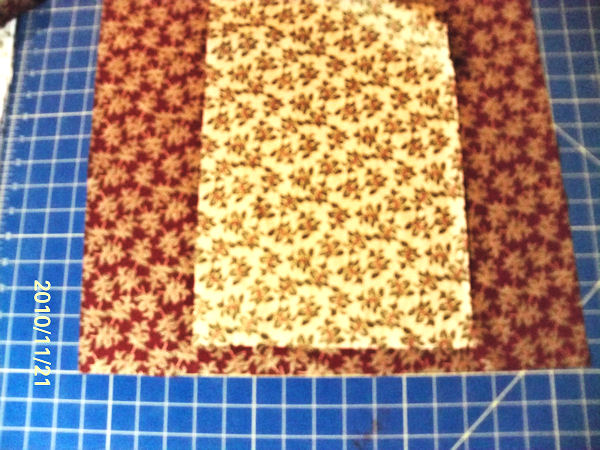
Two fabics / two sizes of table runner.
 
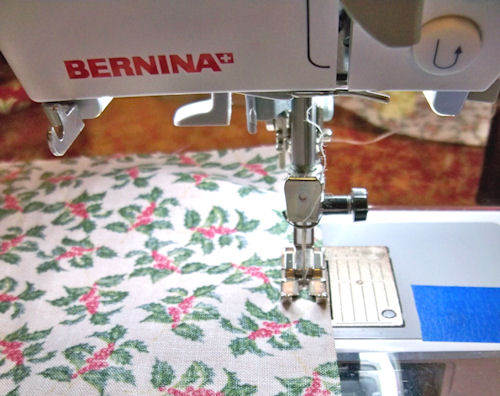
Place both fabrics ( A and B) right side together. Sew up both sides and create a tube. Use a generous quarter inch seam.


Right sides of fabric together sew with a generous quarter inch seam.
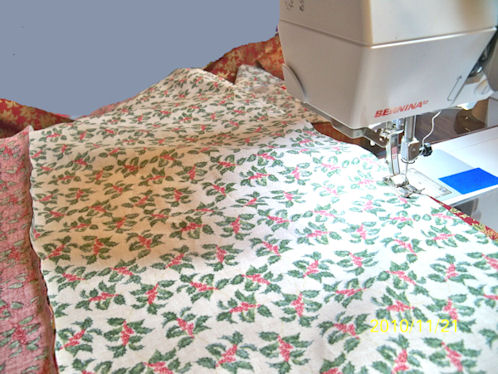
Sew the second side of the table runner.


Set the side seams before turning the fabic outward. It will lay much nicer for you.

Set the side seams before turning your tube outward.


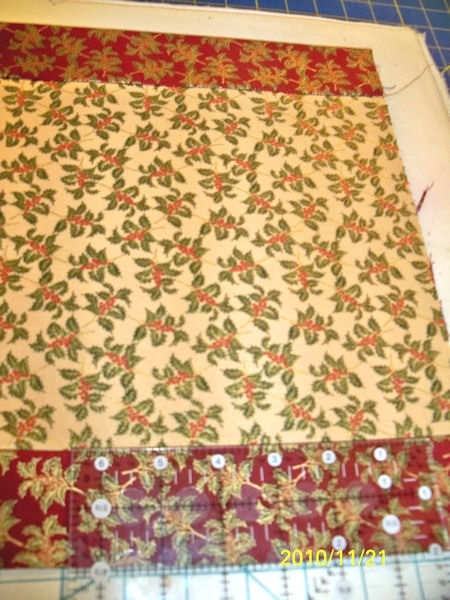
Square up the end of the runner using your favorite method.

Square up the ends using your favorite method.


I then made sure the sides of the runner was distributed evenly before pressing the runner.

I measured the side accent to keep them even then pressed.


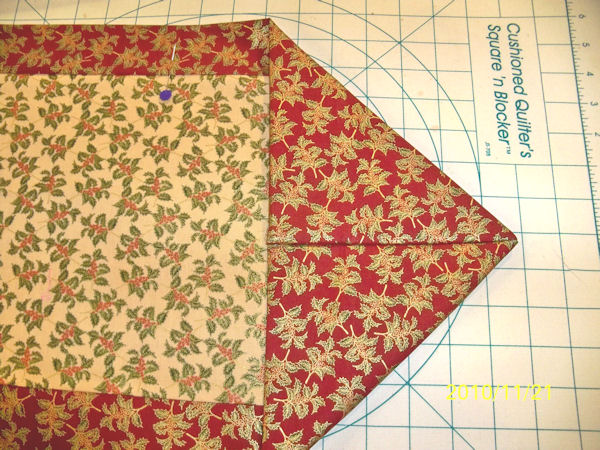
Fold the edges of the runner together. Sew from the edge to the fold. This makes for a nicer finish. There are two options on the way you fold your fabric, it determines how the runner will look.

Sew from the edge to the center fold


Option one : The accent fabric is sewn and folded so the point detail is to the front of the runner.

Option One : end treatment


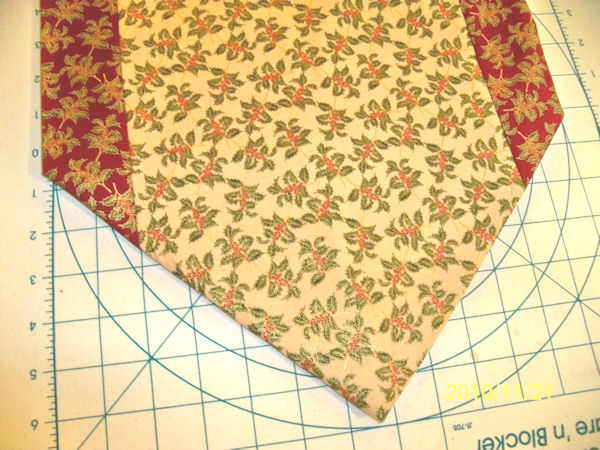
Option Two: The fabric is sewn so the point is flipped toward the bottom. Press well. Finish the runner in a method you like. Sew around the end or the entire table runner, using a straight stitch or a blind hem. You can also consider using decorative stitches; some decorative stitches look just as good on the back as they do on the front. You can also do some free motion OR  straight line quilting.

Second Option

More of MY QUILTING EFFORTS

LONG ARM QUILTING with my family hand prints in the pattern.
The above quilt was quilted by a long armer.  I had tracing of the hand prints belonging to the baby, baby’s mother, father, grandfather and my hand prints.  Added details include the child’s name, birthdate, parents and grand parents name.  Have you ever tried to get hand prints of an infant?  It is harder then you think. 
I thought I had trained my daughter better….. She washed the quilt in very hot water without SHOUT DYE CATHERS.  She then put it in the dryer without re -washing.  What really made me MAD was that I had pre-washed that fabric before using it.
Lesson:  Pre – wash dark fabrics till the water runs clear then wash them again!!!!
Domestic machine quilting -- followed printed design to add texture.
MY DD started this quilt but then decided it was too small.  Even though she had started machine quilting the quilt,  I added borders ( not seen in picture)  to the quilt as if I was adding a waist- band on a skirt.  Borders were a little wonky but they did the job.   I then finished the machine quilting by adding texture to various areas on the quilt making sure it met the requirements of the batting manufactures.  I think you can kind of see some of the texturing where there is suppose to be sand and gravel.   I also outlined all the construction vehicles.
My grandson plays on this quilt with his hot wheels usually whenever he is suppose to be taking a nap !!!

My own machine quilting efforts

I am posting pictures of my own past efforts. Most of these quilt pictures are from 2-3 years ago when I was learning to quilt and needed to get some fast quilts made for my new grandson who is now “2 and a HALF” years old.
 
 
Front - Panel - Free motion and straight line quilting.


I bought yardage of a cute farm print. Squared up the panel and then added pieced border of what I wanted to look like fencing. I put straight line quilting following the print on the material and then free motioned in a thread painting pattern various aspects of the print… ie sky, grasses, around the animals. I used what ever color would blend with the part of print I was on. For my bobbin thread I used a varigated brown thread to blend in the print on the back of the quilt. I kept a close eye on my tension to make sure I did not have bobbles or the top or bobbin thread showing unbalanced. I worked on it in multiple sessions because I rarely got more than 30 minutes at a time to sew. Size of the quilt is a generous nap / lap size about 56 x 56 inches. I think I should have added more free motion quilting to some of the areas, but I kind of got tired of the quilt and JUST WANTED IT DONE!!!!

Bind Weeds on my Fence ! ! ! !


I pieced a picket fence border, which mimiced the fence that encircles the farm near our home. The fence is totally whacky because that is what the neighbor’s fence look like. And besides if the fence is whacky no one will know if I goofed up or not. The grasses, vines and weeds are made to resemble the bind weed that grows everywhere on a MICHIGAN farm fence.


Tirade against converter box TV, specifically PBS and Create TV


Having a Nasty, Coughing Day in Bed

First off let me say that we have cut the cable because we were not watching TV enough to justify the payment of $100 for a dish or cable. Usually I am up and about quilting, or cooking, or doing something around the house (not cleaning.) I do spend more time on the Internet then I should, i.e. this blog. I am stuck in bed with a bad cold, coughing my head off and just trying to breath. I am reduced to watching regular converter box TV. I am watching Create TV and they are having a special BURT WOLFE, THE HISTORY of FOOD. It is kind of interesting but I also know at some point, today, Create TV will repeat all the shows that I have seen and I will have to find something else to watch.


I am lamenting the loss of quilting on TV today. I am probably going to spend the day in bed and I have nothing interesting to watch because the power –that-be on the TV stations have decided that quilting/ sewing shows are not interesting enough. Of course they do not give us much of an alternative. It will be sports all day long.


My theory is it is a conspiracy of the male dominated TV hierarchy. They completely ignore the interest of women and give dominance to male oriented shows. Never mind women are at home more, woman run the home and family budget and control the spending. The shows on TV are for men. There are sports, car shows, home improvement and news. Gone are the women shows especially those for older, senior women.


My further theory is that shows, the TV hierarchy, (specifically PBS, WHO are suppose to be the education channels) do put on is aimed at keeping the American population uneducated and fat. Food shows usually highlight the most un-healthy, fat and sugar laden recipes. The healthy cooking shows are far and few between. I also do not like the current group of LIFE STYLE and crafting shows on TV. Most of are Martha Stewart rip offs but they do not show any fine workmanship. The crafts they show are tacky and unoriginal. Most of the shows on Create and PBS are just old re-hashed shows. For example, Lidia’s Italy, American Cooking, Katie Workshop shows are from early 2000s. As much as I like or dislike a show seeing it televised repeatly, ad-nauseum does not make me fonder of these TV show, seems like a waste of air time.


I wish that TV/ PBS would actually televise programs that are truly educational. They show home improvement shows, wood working, car shows, why do they not televise shows showing how to fix and repair your computer or operate software programs that are actually useful. Kids learn a lot about using various programs in high-school and college programs. (In my generation we took classes in typing, book-keeping and secretarial skills.. shows you how far out of it, I am. ) There is a whole generation of men and women did not have computers in their school and work experience and could really use such information but there are no useful classes- shows on TV.


Well enough of my Nyquil induced / cold driven rant for today. I think I am going to brave driving to Wal-Mart and buy a new DVD player so I can watch my collection of quilting DVDs. Maybe then I will not be so cranky.


Have a happy quilting day…. and remember to breath!!!

.

More Machine Quilting Pictures

~~~~~~~~~~~~~~~~~~~~~~~~~~~

I should explain that I do crop and edit the pictures to make them easier to view. I do not color or change any significant aspects of the pictures, but I frequently paint out a messy background. When I am able I note if the quilt is hand or machine quilted on domestic machine or a long arm. I do not always have the information available and then it is up to the viewer to decide for themselves. The purpose of these photos are to highlight various quilting technique I am trying to train my eye to explore the differences between the various techniques.
I am also trying to use other quilting techniques in my own quilting. Our quilt guild is having an art quilt challenge. Members are suppose to make an art quilt based on their idea of what makes an art quilt. The only rule is the project has to be larger than 15×15 inches or 225 square inches. Any shape size larger is okay. I will be posting my efforts as I go along. I am planning to work on this project almost exclusively until January.


Machine Applique with Domestic Machine Quilting


Baptist Fan Quilting Pattern


Thread painting combined with Domestic Machine Quilting.


Thread Paining with Domestic Machine Quilting


New York Beauty - Domestic Machine Quilting


Domestic Machine Quilting of New York Beauty


One Block At a Time- repeat same pattern - Domestic Machine Quilting


Sharon Schambers Workshop- Learning to Machine Quilt- Domestic


Sun Flower - Domestic Machine Quilting- Sharon Schambers Workshop


LeMoyne Star With Fans - Long Arm Quilting


Hand Quilted - Vintage Quilt


Stencil Quilting One Block at a Time- Domestic Machine Quilting

Exploring Machine Quilting

““““““““““““

Exploring  Machine Quilting Techniques:


I am planning to free motion a small quilt I have been making for a friends little girl.  Since I have not done much machine quilting and I have been looking at quilts and how they were quilted.  I find that quilt shows are one of the best places to really look closely at a quilt’s details.  Since I do not know the maker I can be as obsessively nitpicky or as admiring as the quilt warrants.  As I go through the show taking close ups of the quilting detail.  I frequently take notes about the pattern, the technique, the workmanship.  I frequently make sketches of the quilting pattern so I can duplicate it later.   I have posted pictures of the machine quilting from some of the quilt shows I have been to this past summer.

YES, I will be posting some of my past machine quilting attempts in the future… but you have to promise not to laugh at my poor efforts… AT LEAST NOT WHILE MY POST IS UP… NONNIE.

Enjoy the pictures!

Whole Cloth ... probably quilted on a long arm


I think this was done on a domestic machine.. Close up of a larger piece.


Quilted on a domestic machine... love the Spirals !


Serpetine stitch in the ditch... boarder block motifs... done on domestic machine


quilted by machine

Hand quilting in Baptist fan pattern ( I think)

Whole Cloth with machine quilting... only one block
white bursts ... machine quilting
Hand Applique with Hand Quilting...Whole Cloth painted with hand dying... beautiful quilting details
Applique with hand quiliting
Variation of dressden plate


Whole Cloth painted with hand dying... beautiful quilting details