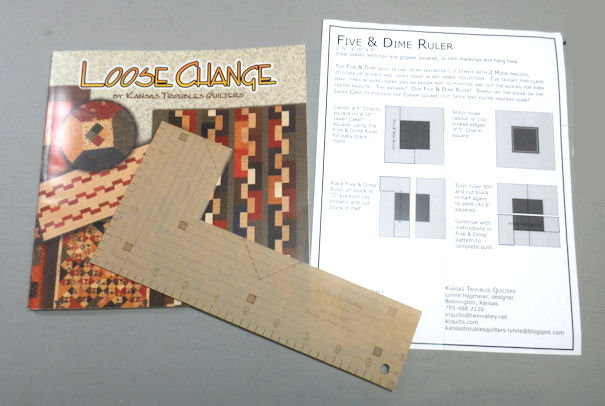
LOOSE CHANGE — NEW TECHNIQUE FOR PRE-CUTS– LAYER CAKES AND CHARM PACKS by KANSAS TROUBLES QUILTERS, AUTHOR : LYNN HAGMEIER. Of course, I did not follow the pattern exactly. I have a lot of make do patches to use so I am modifying the patterns accordingly. The book has about 5 quilt patterns I really like. I think this will be a great method to make donation quilts because it is really quick and easy.

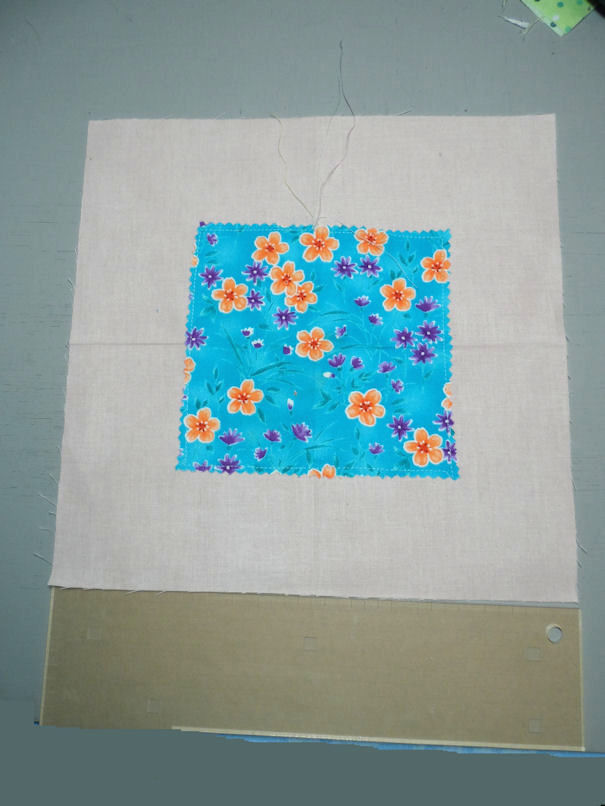
A commercial charm square 5 inches by 5 inches is placed on a layer cake patch 10 inch by 10 inches. For a commercial charm since they are pinked can be stitched with a straight stitch. I used the special ruler to align the charm square and layer cake. Once sewn I used the ruler to line up the cuts. The book has clear cut directions on how to use the ruler.
.

I raided my stash and cut several patches 5 by 5 from large scraps or fat quarters. I tried two techniques, either one works okay but it is labor intensive. One set of patches I cut using my rotary cutter. The other set I pinked using pinking shears, while watching TV. I did this over several nights when I could not sew at my machine. I also had had a huge stack of 6.5 x 6.5 patches I got in guild exchanges over several years. I am using this for the diagonal blocks…. more on that later. I also straight stitched around the patch’s edges.

I have since decided to stitch the edges of the charms with decorative stitches. Yes, it will take longer to make the blocks then using commercial charms and layer cakes and plain straight stitches. (The book said the quilt top could be made in an afternoon.)
.

Once the patch is sewn you then cut the patch horizontally and vertically. The thread tails are cut off and will be in the seam allowances when you sew the patches together. You will need to make 12-16 of these blocks depending on the size quilt you will be making. I also make extras so that I have a good assortment of cut patches to make a pleasing arrangement. I am using solid KONA and tone on tones, cut to 10in x 10in, layer cake blocks as my background. The colors range from pastels to medium lights all from my stash. For most part I am using stash cut charm squares. I have a large assortment sewn and ready to be cut for more patches.
Once sewn I press the seam open. I found that due to the multiple layers the patches lie flatter when pressed open.
 BLOCK A: four patches mixed and matched then sewn together.
I have made the equivalent of 10 blocks that will be divided into 4 patches and re-sewn to make scrappy FOUR PATCHES on a layer cake. Once sewn you loose a half inch to the blocks and they will need to be square up to 9.5 inch blocks before sewing them to Block B. BLOCK A and B alternate across the rows.
- BLOCK B is cut on the diagonal. The patches are shuffled and sewn together.

- Second cut on the diagonal
Blocks A and B will be alternating across the rows. I have not decided on what size quilt this will finish at. 5 blocks across will be around 45 inches for a nice baby quilt; or slightly larger 6 blocks at 56 inches across. Down will be 5 or 6 blocks to.
For me this is a make do project in that I do not have any Layer Cakes or Charm Packs so I plan to go through my stash and just pick out suitable fabrics and cut my own 10×10 background and 5×5 charms. I also have TONS of 6.5 charms from charm exchanges at my guild and from on line. I will uses those in the diagonal cut B blocks. All in all this will be a cute project that will make some cute baby quilts for donation or gifts. I already planned some free motion quilting patterns using things I learned from my Craftsy classes.
If you use pre-cuts and plain stitching (charms with pinked edges the project can be done in an afternoon. It will take longer if you cut your own fabric from your stash. Also the use of decorative stitches will also slow the project down but it is so much fun to explore the fancy stitches on my machine. I also think that because I am not fusing, by selecting stitches that tack the edges down I will get less fraying.
Speaking of fusing, I found that the corners on my charms tended to curl when I was preparing them. If found I used a dab of washable glue stick, kept the corners under control, till they were sewn.
I also suggest when doing decorative stitches you start and stop the pattern at the corners of the charms. On my old machine I found by resetting the stitch to a straight stitch and then resetting the decorative stitch I got a much nicer pivot. I tried to take care that the patterns did not over lap each other, by straight stitching on the edge of the charm to an appropriate area where I could restart my pattern. I will try to post pictures of what I mean in another post as this explanation is as clear as mud.
This is the quilt technique I will be demonstrating in my quilt guild for the annual FOUR CORNERS TEACHING DEMOS in June. I plan to have a quilt top made demonstrating the techniques I have discussed here. I will have a mock up the steps and the book and rulers. (Books and rulers from a local quilt shop will be available for purchase.) I talked about this project on my last podcast, EPISODE 41.
Here is where you can see the video demonstrations of Ms Hagmeier’s technique …. QUILTING WITH THE STARS: FONS AND PORTER PRODUCTION
I also talked about the Ricky Tims Seminar. I blogged about the Seminar and have posted pictures in earlier blogs. Take time to check them out as the quilts are gorgeous. In a way this project is an homage to Ricky’s seminar as he said to always ask yourself, “WHAT IF” and I am ” WHAT IFF-ING ALL OVER THE PLACE WITH THIS PROJECT.
Happy Quilting,
Nonnie
~~~~~~~~~~~~~~~~~~~~~~~~~~~~~~~~~~~~~~~~~~~~~~~~~~~~~~~~
UPDATED: JUNE 22, 2013
I finally got this little quilt top assembled. I was not sure I liked the top because I felt the solids was too dull, but when it was assembled a secondary emerged and suddenly I love it. I chunked the blocks together and was only able to sew one section together each night after I got home from work. It actually took less then 6 hours to assemble the top and I finally got the chunks sewn together this morning.
Here is a bad picture of my cute little quilt. I do not have a place to hang a real design wall in my house. But I make do as best I can. I hung the quilt on a flannel back table cloth over the deck. I will get a better picture hopefully this week or when the quilt is finally finished.

Now I am going to iron this top and the backing then get it ready for the demo coming up. Then I will be sending this off to the long arm quilter for basting. I have some ideas on free motion quilting for this little quilt and I have the perfect thread picked out.
Time:
Cutting out the patches and assembling the units … 8 hoursDecorative stitching: I did that on nights I wanted just mindless sewing but I think that was another 4- 6 hours. Straight stitching would have been a lot less time.
The assembling of the blocks took less than 6 hours but it was divided up over several night.
TOTAL TIME: Estimated 20 hours
~~~~~~~~~~~~~~~~~~~~~~~~~~~~~~~~~~~~~~~~~~~~~~~~~~~~~~~~
https://nonniequiltingdreams.wordpress.com/ Nonnie’s Blog
http://nonniesquiltingdreams.podbean.com/ Nonnie’s Quilting Dream Podcast
Pod cast link for Nonnie’s Quilting Dreams
email me at: nonniequiltingdreams@gmail.com

 BACK: seams pressed open

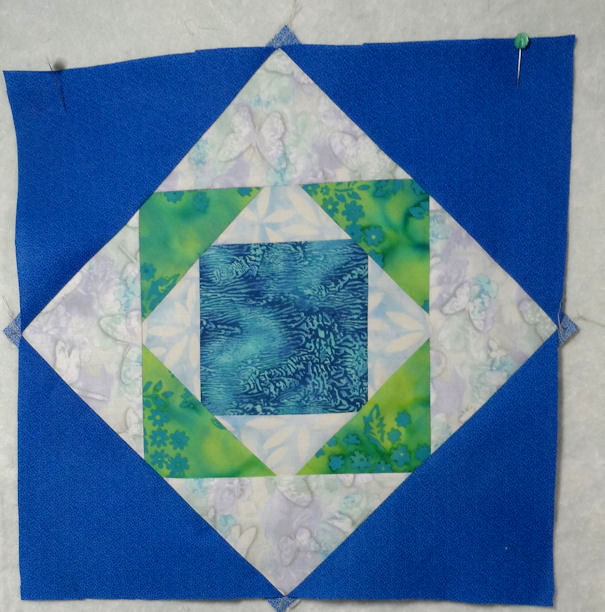
 Finished Blocks
